Introduction
The purpose of this guide is to walk through the process of creating an Outlook add-in that allows the user to access their GitHub Gists to send it in an email.
Prerequisites
- js
- Yeoman
- Microsoft Office Add-in Project Generator
- Internet Explorer version 11 or later
You will also need Outlook 2016 or later connected to an Office 365 account, Outlook.com account, or a Microsoft Exchange Server and a GitHub account to test all of the features of the add-in we’re going to create.
Once you have Node.js installed, you can install all of the other prerequisites via NPM:
npm install -g yo generator-office
Create the Add-In
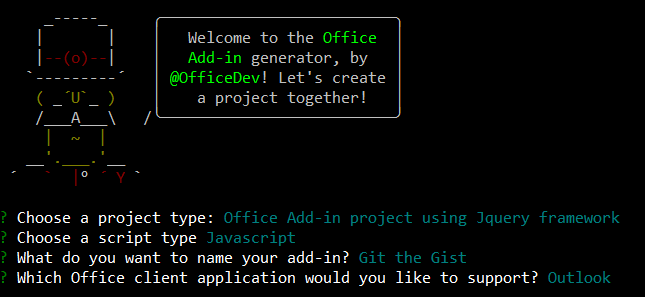
Open your command prompt/shell in an empty directory. Enter “yo office” and follow the prompts.
- Choose a project type– Office Add-in project using JQuery framework
- Choose a script type– JavaScript
- What do you want to name your add-in?– Git the Gist
- Which Office client application would you like to support? – Outlook
Update the Manifest
Before we load the add-in, we need to make one change to the manifest file. The generator adds a placeholder value for the SupportUrl element which is not a valid URL. This makes the file failed validation.
Open the manifest.xml and locate the SupportUrl element. Remove or comment the line and save your changes before you continue.
Step 1: Open the manifest.xml file. Locate the ProviderName element in the XML and replace the default value with your company name.
<ProviderName>Contoso</ProviderName>
Step 2: Update the Description with a description of the add-in.
<Description DefaultValue="Allows users to access their Gists on GitHub"/>
Locate the line in the manifest that reads </DesktopFormFactor>. Above this line, insert the following XML:
<ExtensionPoint xsi:type="MessageComposeCommandSurface">

            <OfficeTab id="TabDefault">

              <Group id="msgComposeCmdGroup">

                <Label resid="groupLabel"/>

                <Control xsi:type="Button" id="msgComposeInsertGist">

                  <Label resid="insertGistLabel"/>

                  <Supertip>

                    <Title resid="insertGistTitle"/>

                    <Description resid="insertGistDesc"/>

                  </Supertip>

                  <Icon>

                    <bt:Image size="16" resid="icon16"/>

                    <bt:Image size="32" resid="icon32"/>

                    <bt:Image size="80" resid="icon80"/>

                  </Icon>

                  <Action xsi:type="ShowTaskpane">

                    <SourceLocation resid="addGistPaneUrl" />

                  </Action>

                </Control>

              </Group>

            </OfficeTab>

          </ExtensionPoint
Now let’s look at exactly what that does.
- The ExtensionPoint with xsi:type=”MessageComposeCommandSurface” indicates that we’re defining buttons to add to the message compose window.
- By using an OfficeTab element with id=”TabDefault”, we’re indicating we want to add our buttons to the default tab on the ribbon.
- The Group element defines the grouping for our buttons, with a label set by the groupLabelresource.
- The Control element contains an Action element with xsi:type=”ShowTaskPane”, so this button will open a task pane.
Finally, we will update our resources. The code above referenced labels, tool-tips, and URLs that we need to define before our manifest will be valid.
Step 1: Add the following as a child of the bt:Urls element:
<bt:Url id="addGistPaneUrl" DefaultValue="https://localhost:3000/src/insertGist.html"/>
Step 2: Add the following elements as children of the bt:ShortStrings element.
<bt:String id="groupLabel" DefaultValue="Templates"/>

<bt:String id="customTabLabel"  DefaultValue="My Add-in Tab"/>

<bt:String id="insertGistLabel" DefaultValue="Insert Gist" />

<bt:String id="insertGistTitle" DefaultValue="Insert Gist"/>
Step 3: Add the following elements as children of the bt:LongStrings element.
<bt:String id="insertGistDesc" DefaultValue="Select gist from list to add their contents into the mail message"/>
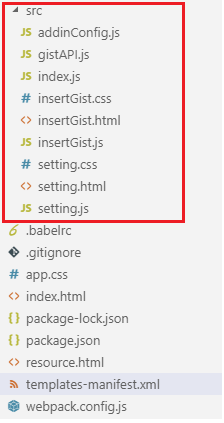
Set the Structure of file
Find the attached source files and set in below hierarchy.
Sideload the Add-In
- In your command prompt/shell, make sure you are in the root directory of your project, and enter npm start. This will start a web server at https://localhost:3000 and open your default browser to that address.
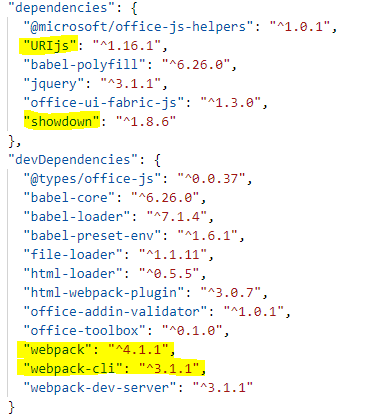
Note: – If you found any error then please check in package Json that you have installed required node module or version of node module is right as below screenshot.
Sideload an add-in in Outlook in Office 365
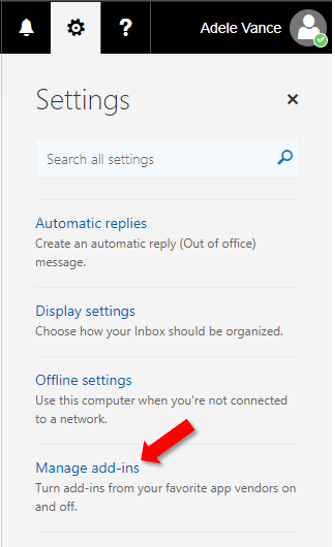
- Go to Outlook in Office 365.
- Choose the gear icon in the top-right section and select Manage add-ins.
- On the Manage add-ins page, select Add-Ins, and then select My add-ins.

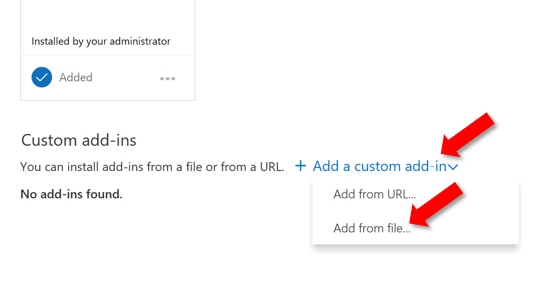
- Locate the Custom add-ins section at the bottom of the dialog. Select the Add a custom add-in link, and then select Add from file.
- Locate the manifest file for your custom add-in and install it. Accept all prompts during the installation.
Output
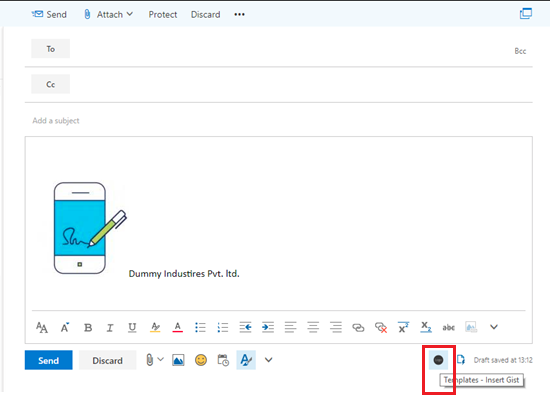
- Click on the new button.
- You can find add-in as below screenshot.
- After clicking on add-in you can see the panel as below.
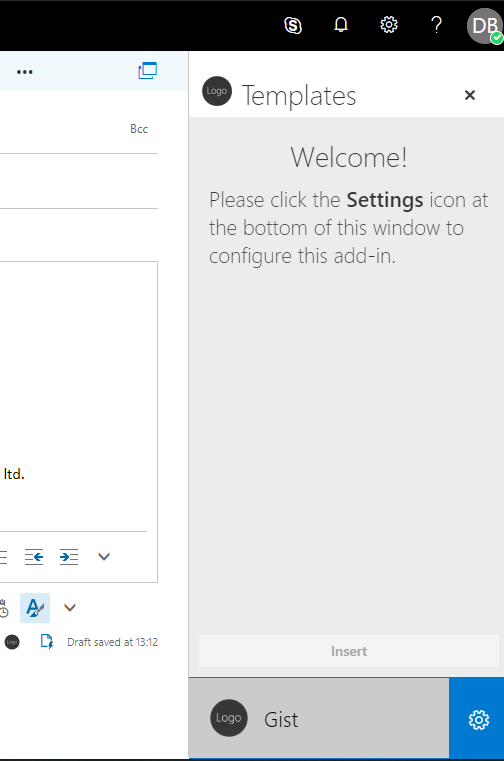
- Now click on setting gear icon at the bottom left of the panel. It will open a dialog box for configuration.
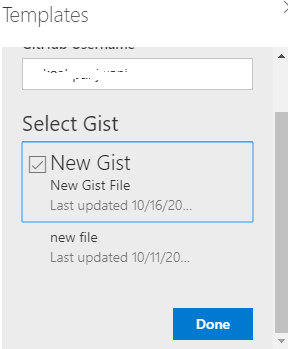
- Add GitHub Username as below and click on outside of textbox to find your gists.

- Select gist and click on Done button as below to add it on the panel.
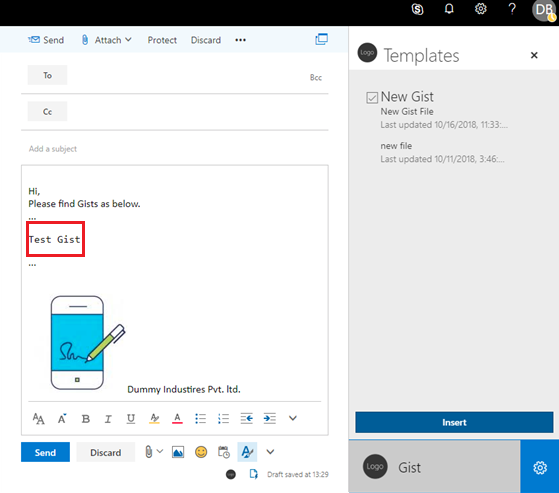
- Select gist from the panel and click on insert button to add it in mail body as below screenshot.
Download the source code from the given below link: