A new approach for customizing modern SharePoint Online Team and Communication sites and pages in Office 365 has arrived. It is knows as SharePoint Framework (SPFx) extensions and replaces traditional methods that SharePoint developers have used to deliver key scenarios such as:
- Adding JavaScript to every page in a site/web.
- Injecting controls such as mega-menu/global navigation, breadcrumb, message bar, etc. into every page.
- Adding items into toolbars/menus.
- The rendering/behavior of a specific field in a list.
To learn more more about SPFx please follow the below link:
https://blog.dodhia.co/sharepoint-development-part-1-spfx-overview/
SPFx extensions provide the equivalent of CustomActions and JSLink the previous development concepts, which did not necessarily translate to modern pages.
In this article, I want to focus on the first two scenarios (in Bold) listed above referencing JS on every page and running custom code to insert objects in the header and footer area of the page using SPFx extension Application Customizer.
Application Customizers allow you to add scripts on a page; it could be JavaScript, React JS as an example. This will allow you to extend the SharePoint’s existing functionalities.
Alternatively, you could insert custom rendering logic in HTML element placeholders. Microsoft wants to make it possible for you to modify elements, such as the header and footer among others, in a supported manner.
I have implemented this Application customizer using Type Script.
Also, note that currently Application Customizer supported at the Site level, Web level and to the List scopes. Let us see how to create a simple Application Customizer.
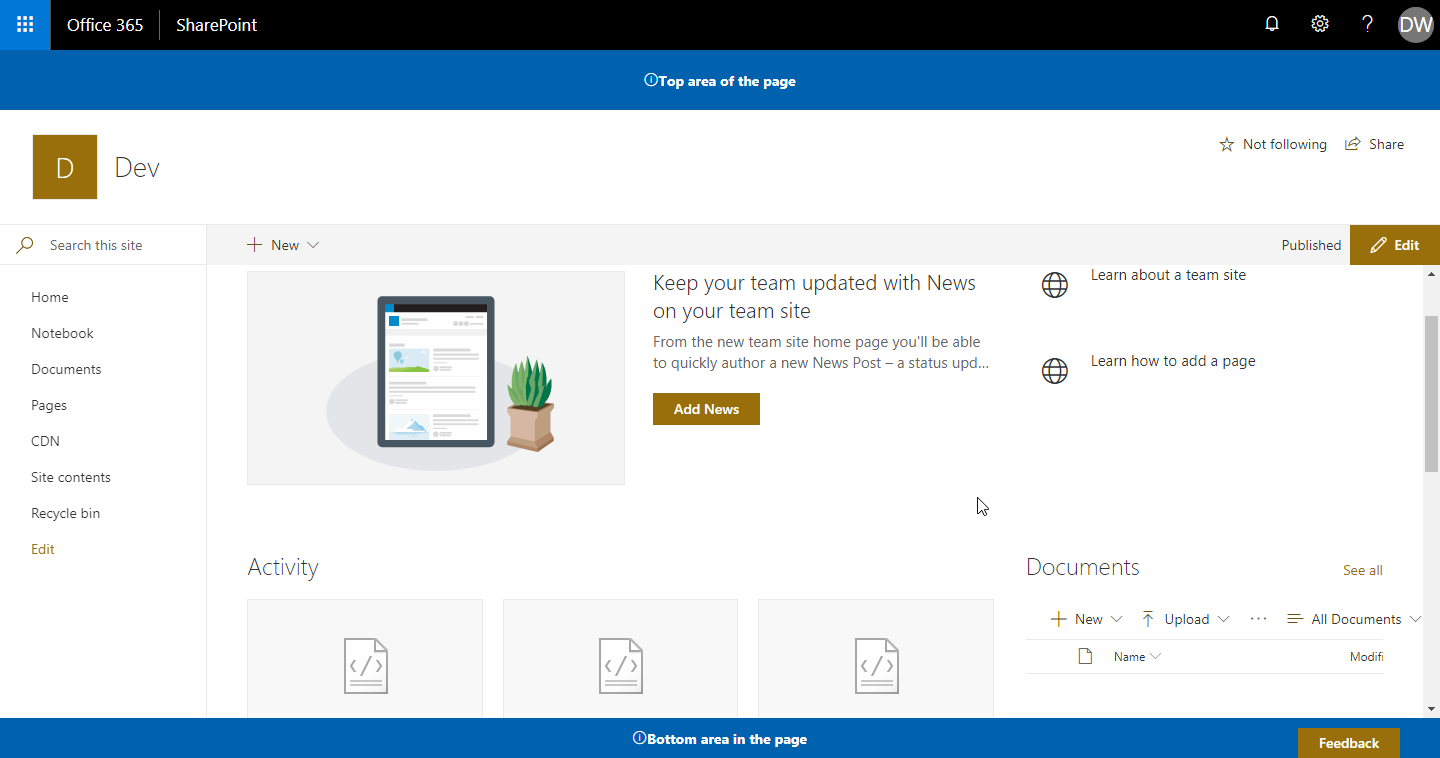
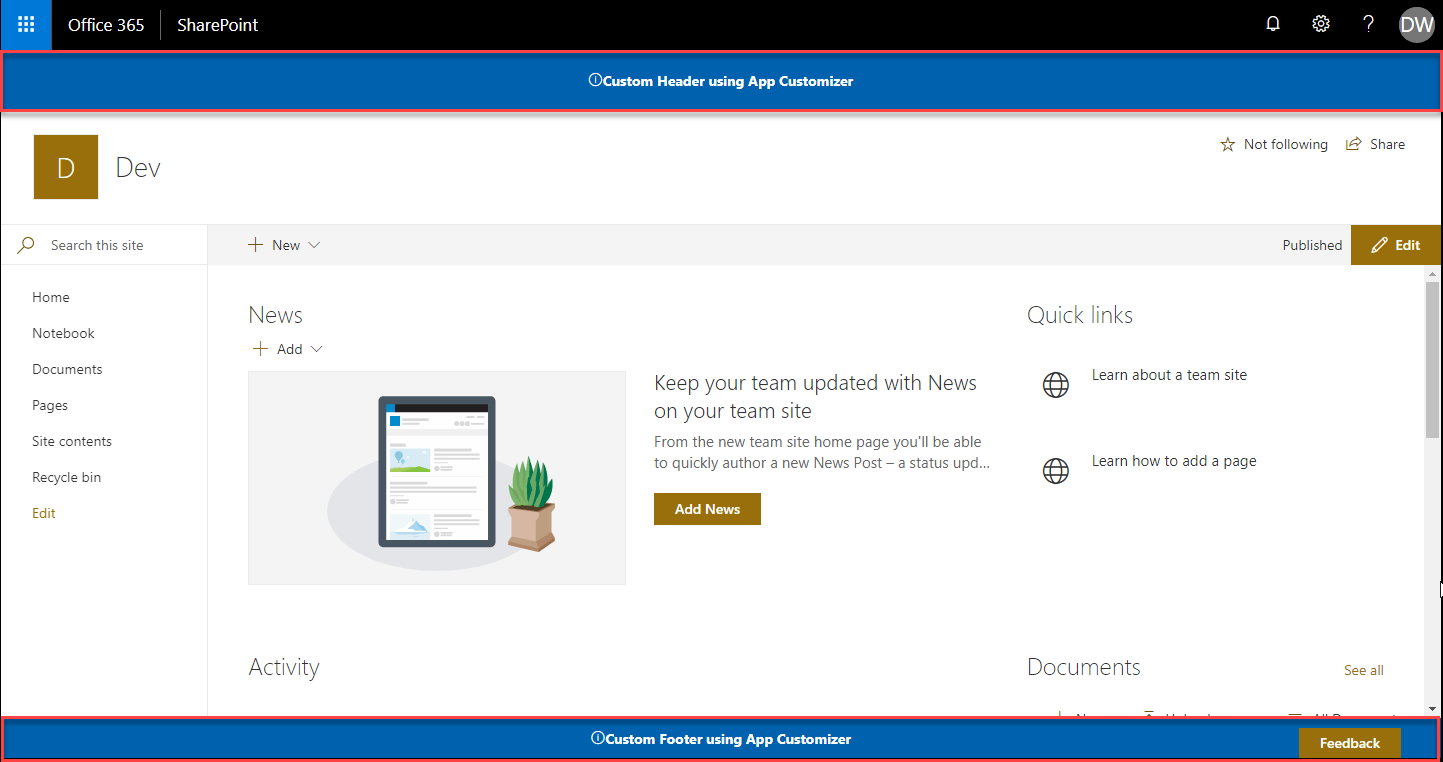
We now have the following two zones in modern pages:
- Top (Header)
- Bottom (Footer)
We are expecting some more zones in the future! Here’s what the Top (header) and Bottom (footer) zones look like:
Home Page:
Internal Pages(Site Contents):

List and Library Level Pages:
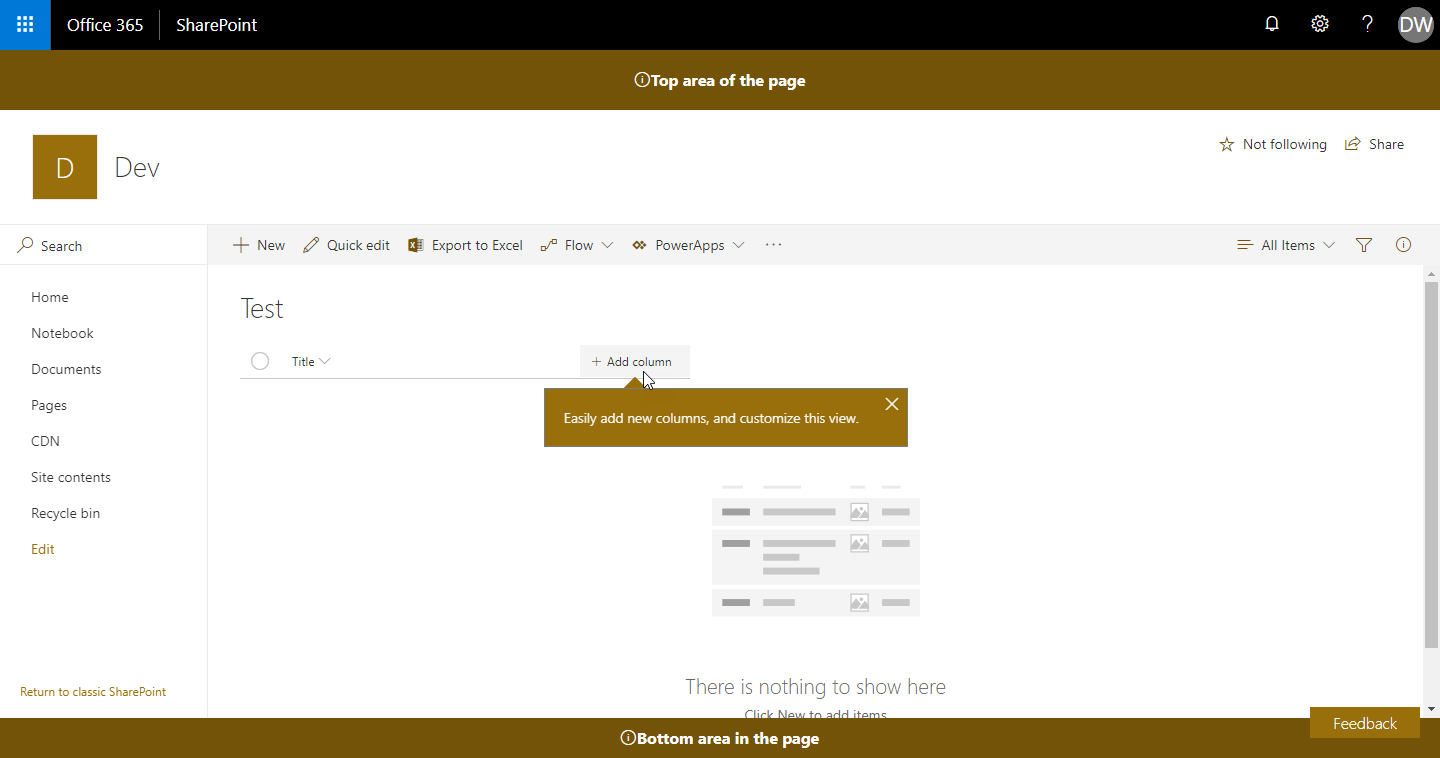
As we have seen that the Customization can be done into Internal Pages too.
Download the latest source code from below link:
https://github.com/mindlabco/Custom-header-footer-for-modern-site
Here is given a Quick Overview how you can Test and Deploy an SPFx Extension Solution Application Customizer.
Test your Application Customizer
I am expecting you have already set up your SPFx development environment. If not please follow below link and set up your SPFx Development Environment first.
https://docs.microsoft.com/en-us/sharepoint/dev/spfx/set-up-your-development-environment
Open downloaded source code in Visual Studio Code.
You cannot use the local Workbench to test SharePoint Framework Extensions as its use for SPFx webpart. You need to test the Solution into the Live SharePoint Online site.
- Move to the serve.json file in the config folder.
- Update Page URL to match your own tenant, which you want to use for testing. You can use any URL with modern experience. *This could be for example a welcome page of a new group associated team site, which would mean somewhat following URL:
https://infowebsp.sharepoint.com/sites/yoursite/SitePages/Home.aspx
Your serve.json file should look somewhat following (updated with your tenant details):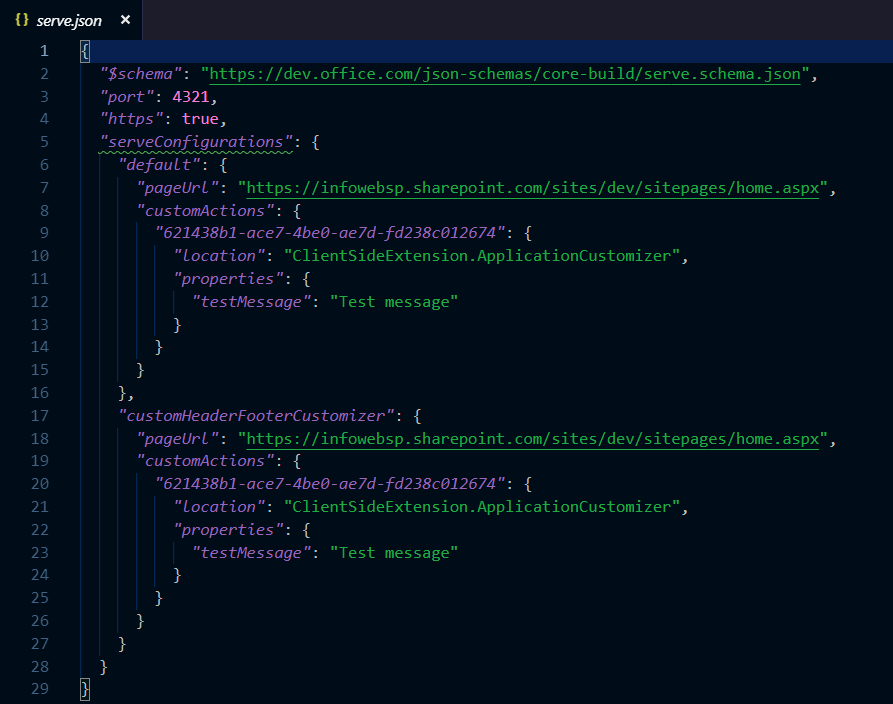
- Switch to your console, ensure that you are still in the app-extension directory, and then enter the following command:
gulp trust-dev-cert
Note- Developer certificate has to be installed ONLY once in your development environment so you can skip this step if you have already executed that in your environment.
- Compile your code and host the compiled files from your local computer by running the following command:
gulp serve
When the code compiles without errors, it serves the resulting manifest from https://localhost:4321 and also starts your default browser with needed query parameters.
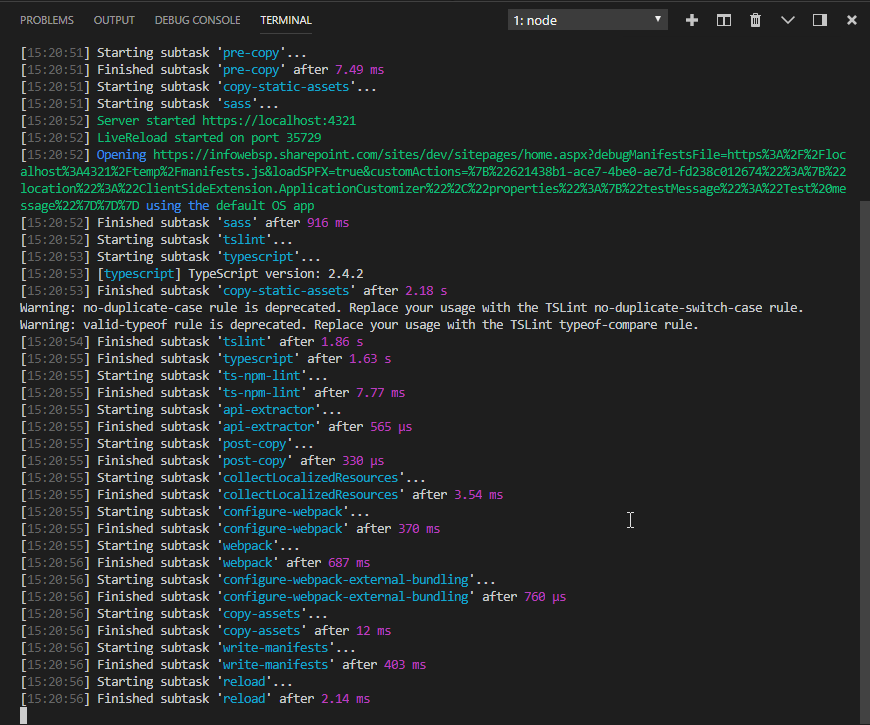
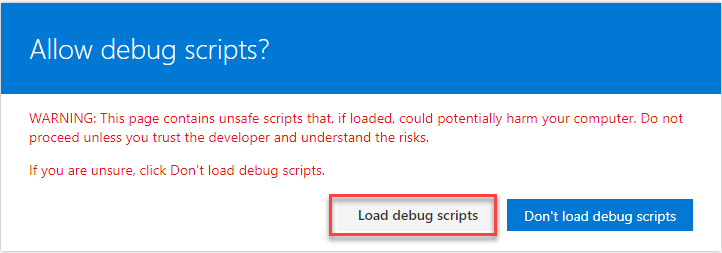
- A Popup will appear in your browser, Select Load debug scripts to continue loading scripts from your localhost. This will allow the solution to load the scripts from our local host and we do not have to deploy on the live site testing of our SPFx Extension.
- Now we are assured that our solution works perfectly. We need to do some modification into our solution to apply the Custom Header and Footer into the Modern SharePoint sites.
- You can update the branding as per your need in CustomHeaderFooterCustomizerApplicationCustomizer.ts file.
Deploy your Application Customizer
- First, complete the steps of testing your extension solution on SharePoint live site as described above.
- After completing the testing and development its time to deploy our solution to the SharePoint live site, Create a document library in your SharePoint site and name it as CDN
- Copy the path of that Document library and paste it into your webpart solution i.e. config -> write-manifests.json file inside “cdnBasePath” as shown in below image.

- Now, fire the below command in terminal, this will generate optimized bundles and copy them to the temp/deploy folder.
-
gulp bundle --ship
- Now, fire the last command to generate the .sppkg package of your extension.
gulp package-solution –ship
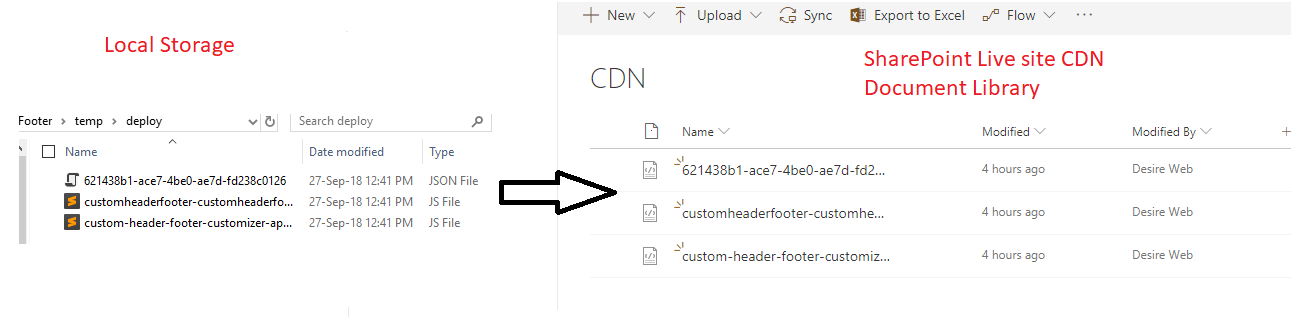
- Navigate to temp -> deploy inside your extension solution and upload all the files which is inside deployed folder to the CDN document library which you have created in step 2.
- Navigate to SharePoint -> Solution inside your extension solution and you need to deploy the “.sppkg” package file, Upload or drag and drop the “.sppkg” package to the app catalog.
 A prompt message will ask to deploy. Just check the URL while deploying the SPFx Extension. It should be the same as the URL, which you have set in step 3. If it is same, then click on deploy otherwise just cancel it and check whether the path in CDN is set properly or not and after that perform the whole process again from the beginning.
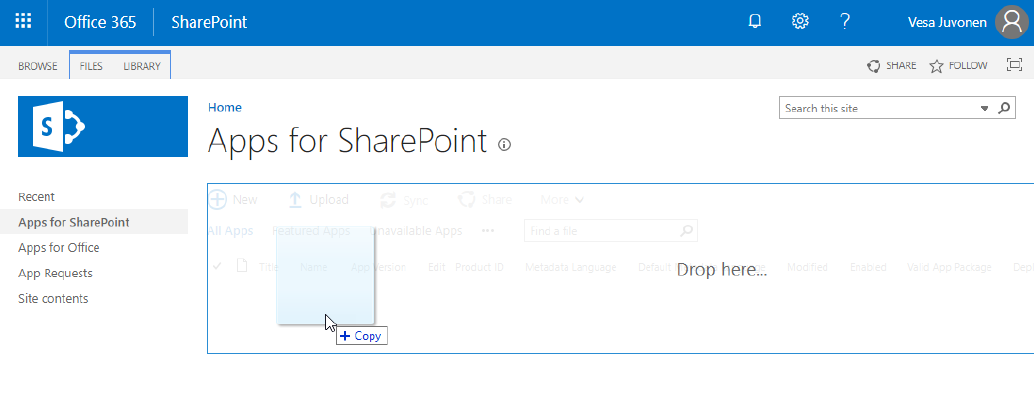
- Install the custom-header-footer-client-side-solution Solution on your site by performing below steps:-
- Go to your site collection.
- Select the gears icon on the top nav bar on the right, and then select Add an app to go to your Apps page.
- Select your app.
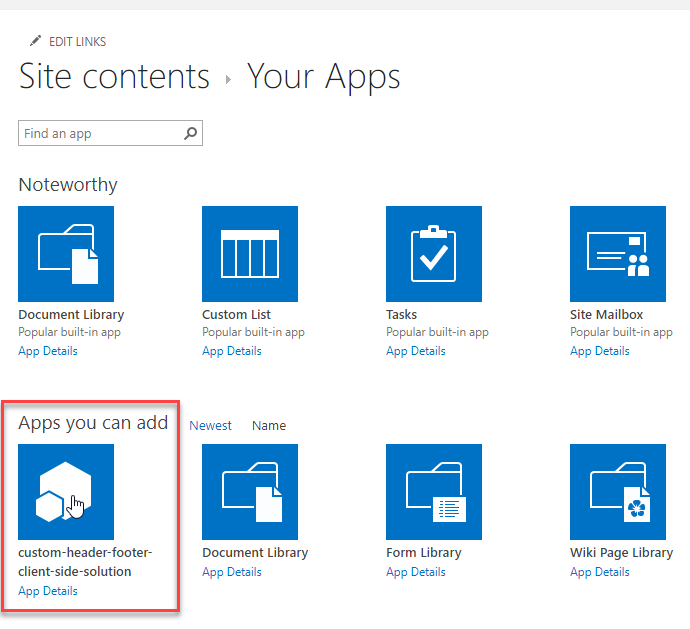
Select your app to install the app on the site. You will have the Custom header and Footer on your SharePoint site after app installation.
Hi Paras ,
I am new to SPFx and am getting an error while i run the below command
gulp trust-dev-cert . the error is something like
Cannot find module ‘@microsoft/sp-build-web’
I tried recreating the solution again but nothing works. can you help me with this?