Why Flow:
Microsoft Flow also lets you develop the “No Code” Automation systems, It’ll allow you to react on Event in one service (SharePoint Online) and do Operation with that data to Other Services (Such as Twitter, Trello, etc.) Flow works like a workflow in SharePoint.
E.g.
When we create a Document into SharePoint Document Library, we can start an Approval process into that library using Microsoft Flow and start the document approval process.
The other big announcement is that Flow and PowerApps will end up being tightly integrated into a SharePoint online list or library. It will actually begin to feel like it’s part of SharePoint, which is pretty cool!
That’s what we are going to perform in this blog today using Microsoft Flow.
Please follow the below link to understand the Business Application using Power App part 1:
https://blog.dodhia.co/sharepoint-business-applications-using-powerapps-and-flow-part-1
Integrate Microsoft Flow
Step 1: Click on the play button it’ll take you to the preview screen of your Application.
![]()
Step 2: On the Preview Screen click on the “+” button it’ll open the New Form (as shown in right side Image).
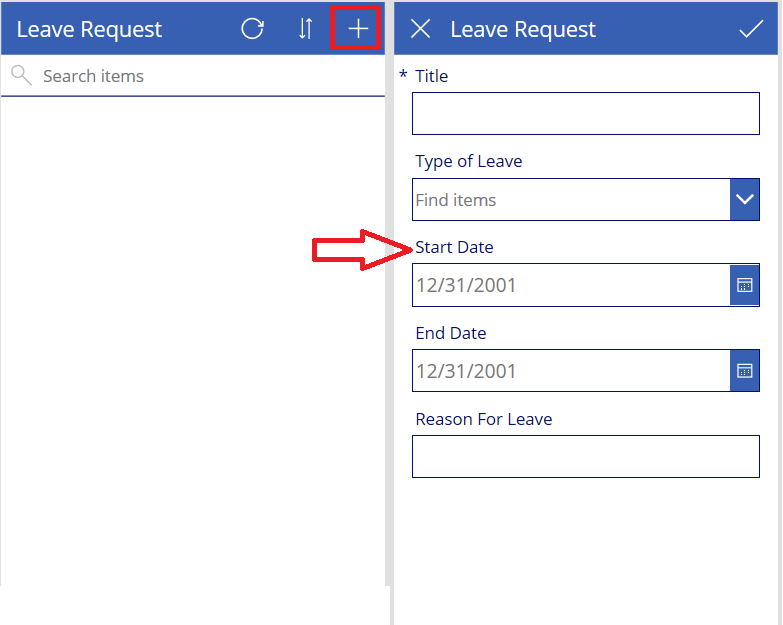
Step 3: Now close the Preview pane by clicking on the cancel button.

Step 4: Now we have a New form which gets Data from the users and Sends it to the SharePoint list. It’s confirmed that we have to integrate the Flow for approval process on this Screen.
Step 5: We are configuring the flow on the click event of the button. For that, we use the button which stores the Data to the SharePoint List.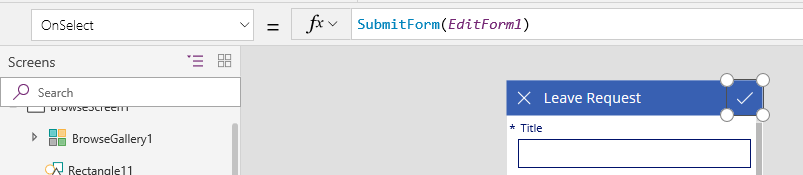
As you can see there is a Function which submits the form data to the Forms, Here we are going to integrate flow so we can start the Approval process.
Step 6: For that, we need to clear the Formula from the Formula bar.
Step 7: Click on the Actions and Under that Click on the “Flows”. It’ll open the New menu for Creating the flow and you can also select your existing flow.
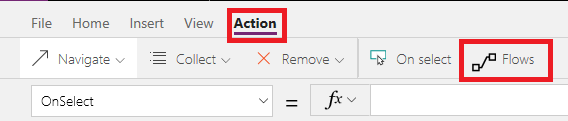
Note: Make sure that the button is Selected.
Step 8: You have new Flow Menu when you click on the Flows button. As I have not created any flows in this Environment it shows nothing, Click on “Create a new flow”.
Step 9: It’ll take you to the Flow.microsoft.com and Creates a new flow which has default trigger to get data from the PowerApps. As below given Image.

Step 10: Create the Flow as per given Configurations, I have attached Template of the Flow in case you have any problem in creating the Flow.
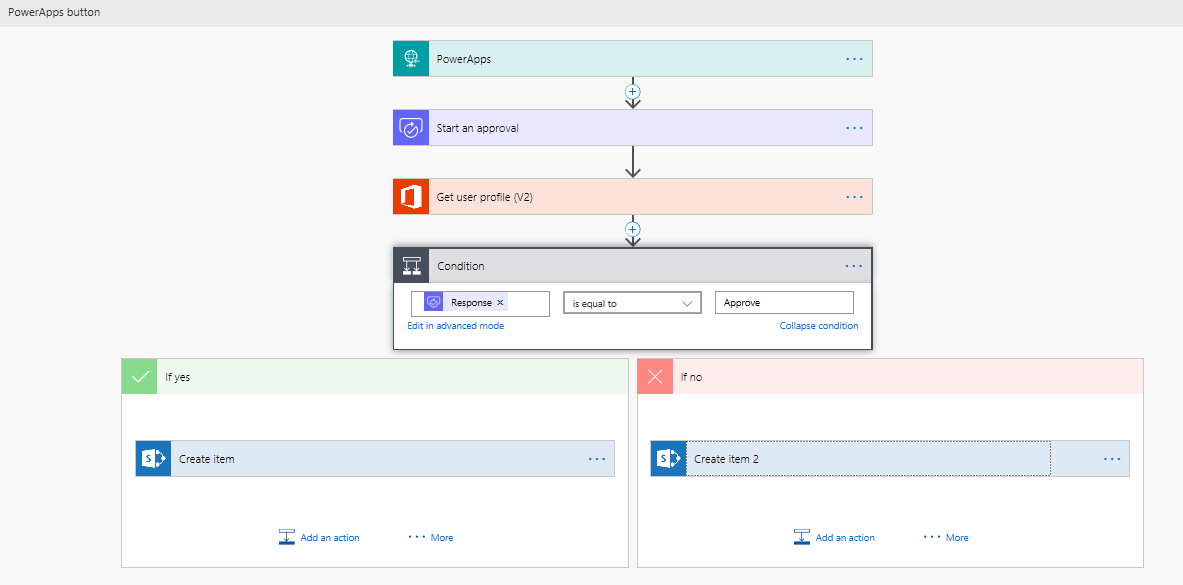
Below Image Describes the Actions and Conditions which I have used into the flow.
Here is the Brief about the process that is done by the flow.
- Flow fetch the data from the PowerApps.
- After that, I have started the Approval process.
- There is Office 365 Action to get information of the Manager who is Approver so we can insert the Name of Manager into the SharePoint List.
- After that, there is a condition if Approver Approves the Request we create Item into the list.
- If Approver Approves we create the Item using data and Update the Status column value to “Approve”.
- If the request is Rejected it also creates the Item in SharePoint list, However, it updates the Status column value to the “Rejected”.
Step 11: At the End click on the Save button, and move to the PowerApps Tab in the Browser.
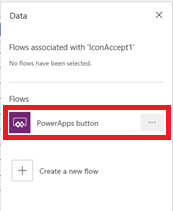
Step 12: On the PowerApps Screen Click on the Action -> Flows and Select the Flow which we have created.
Please make sure that you have still selected the submit icon into the PowerApps because further process depends onto the buttons “OnSelect” event.
Step 13: After selecting the Flow, Update the Formula for Button’s On Select Event that replaces the Given below Formula that will look like below.

Here is the Formula
PowerAppsbutton.Run(DataCardValue8.Text,DataCardValue9.Text,DataCardValue10.SelectedDate,DataCardValue11.SelectedDate,DataCardValue12.Text);Navigate(BrowseScreen1,ScreenTransition.None)
Description of Formula
- Here we have provided the details in “PowerAppsbutton.run()” Function which is needed for the Flow to process further for Approval and creation of item into the SharePoint List.
- And the other Navigate Function used for Navigation to the Browse Screen.
Step 14: Don’t Forget to save this Application. Click on the “File”.
![]()
Step 15: Save the Application to “The Cloud” Click on the Save At the End. Also, give the name to the Application.

Step 16: Share and Publish the Application so all the users can Access the Application.

Working Application
- Fill the Form into the PowerApps and click on the highlighted icon. It’ll Trigger the flow.

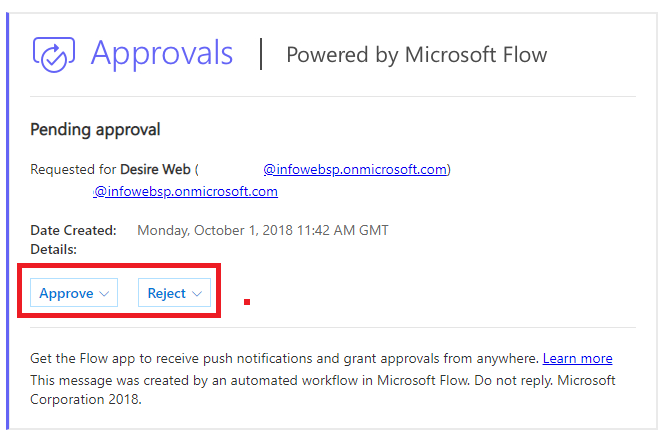
- Approver gets the Mail From Microsoft Flow to Approve or Reject request, Approver can take Action and Approve or Reject the request Directly from the Mail.
- Item will be Created with the help of Microsoft Flow into the SharePoint’s List with Updated Status value in the list based on the Approver’s Approve or Reject Value.
 So the entire process to create a Business Applications such as Leave Management using PowerApps and Flow is completed. You can create your own business Applications like this. Do let me know if you have any queries.
Download the entire build package from below link: