
The Purpose of Teams App Permission Policy
As an admin, we can provision different apps to different teams in Microsoft Teams. With Teams App Permission policy, we can define what app our users can use at the user and organizational level.
Type of Teams apps
There are three types of Teams apps available:
- 1st Party App or Microsoft App
- Third-party App or Non-Microsoft apps
- Custom App or Organisational LOB App
You can allow or block all apps or specific apps published by Microsoft, third parties, and your organization. When you block an app, users who have the policy are unable to install it from the Teams app store. You must be a global admin or Teams service admin to manage these policies.
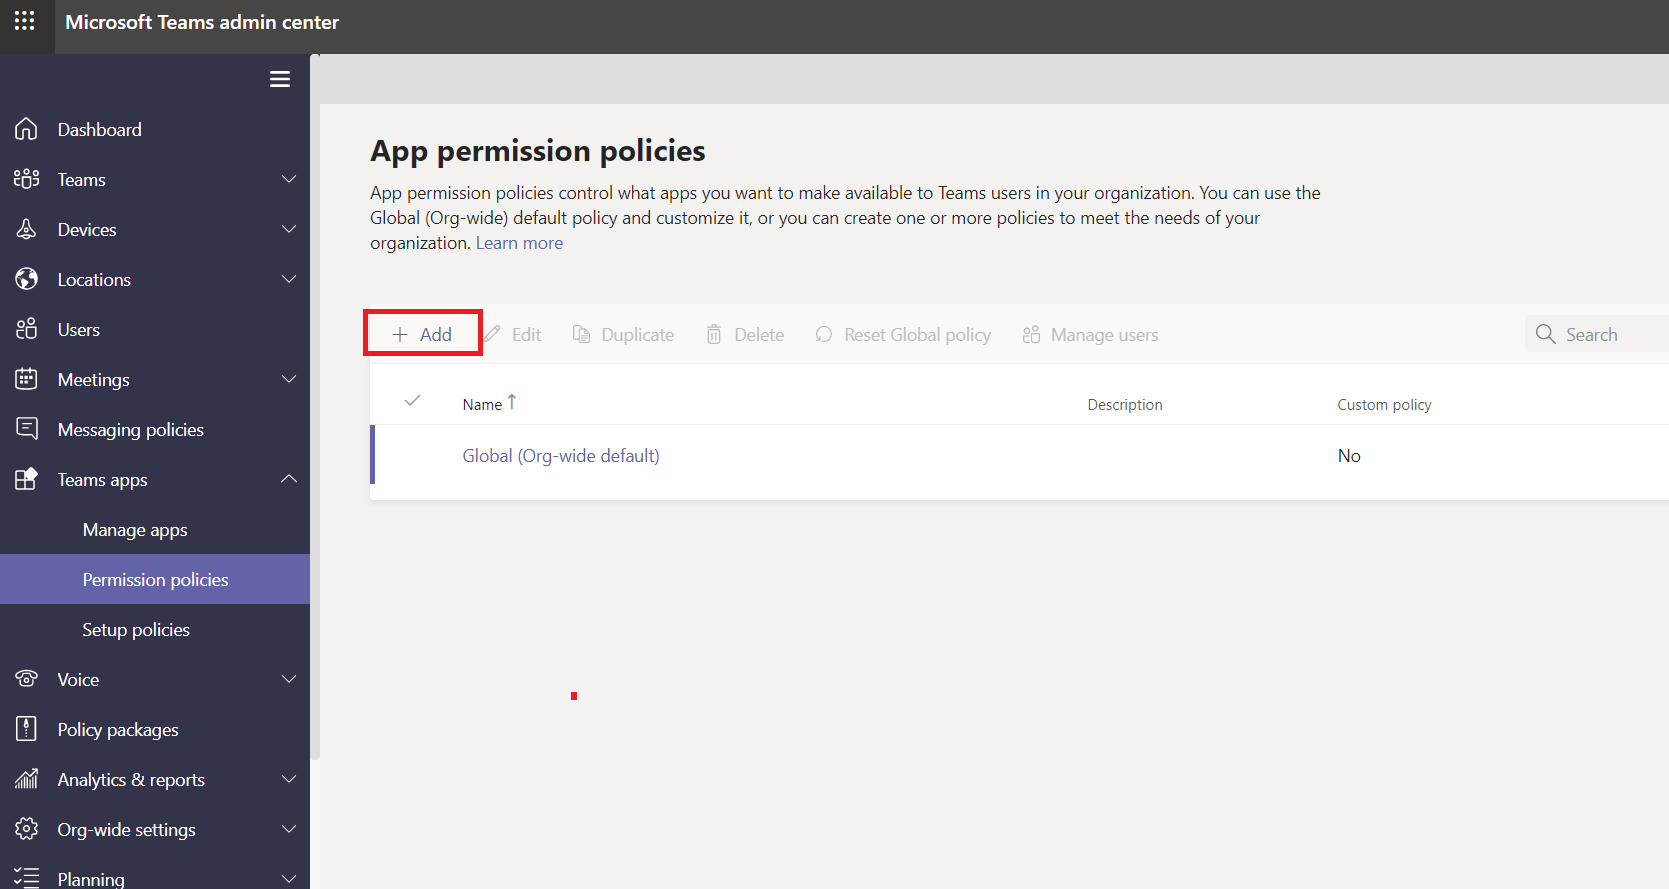
You can manage app permission policies in the Microsoft Teams Admin Center by doing the following:
- Go to office.com and click ‘Admin’
- Click Show All in the left menu
- Click Teams under Admin Center Or use direct URL – https://admin.teams.microsoft.com/dashboard
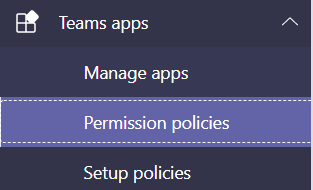
- Click Teams app
- Select Permission policy
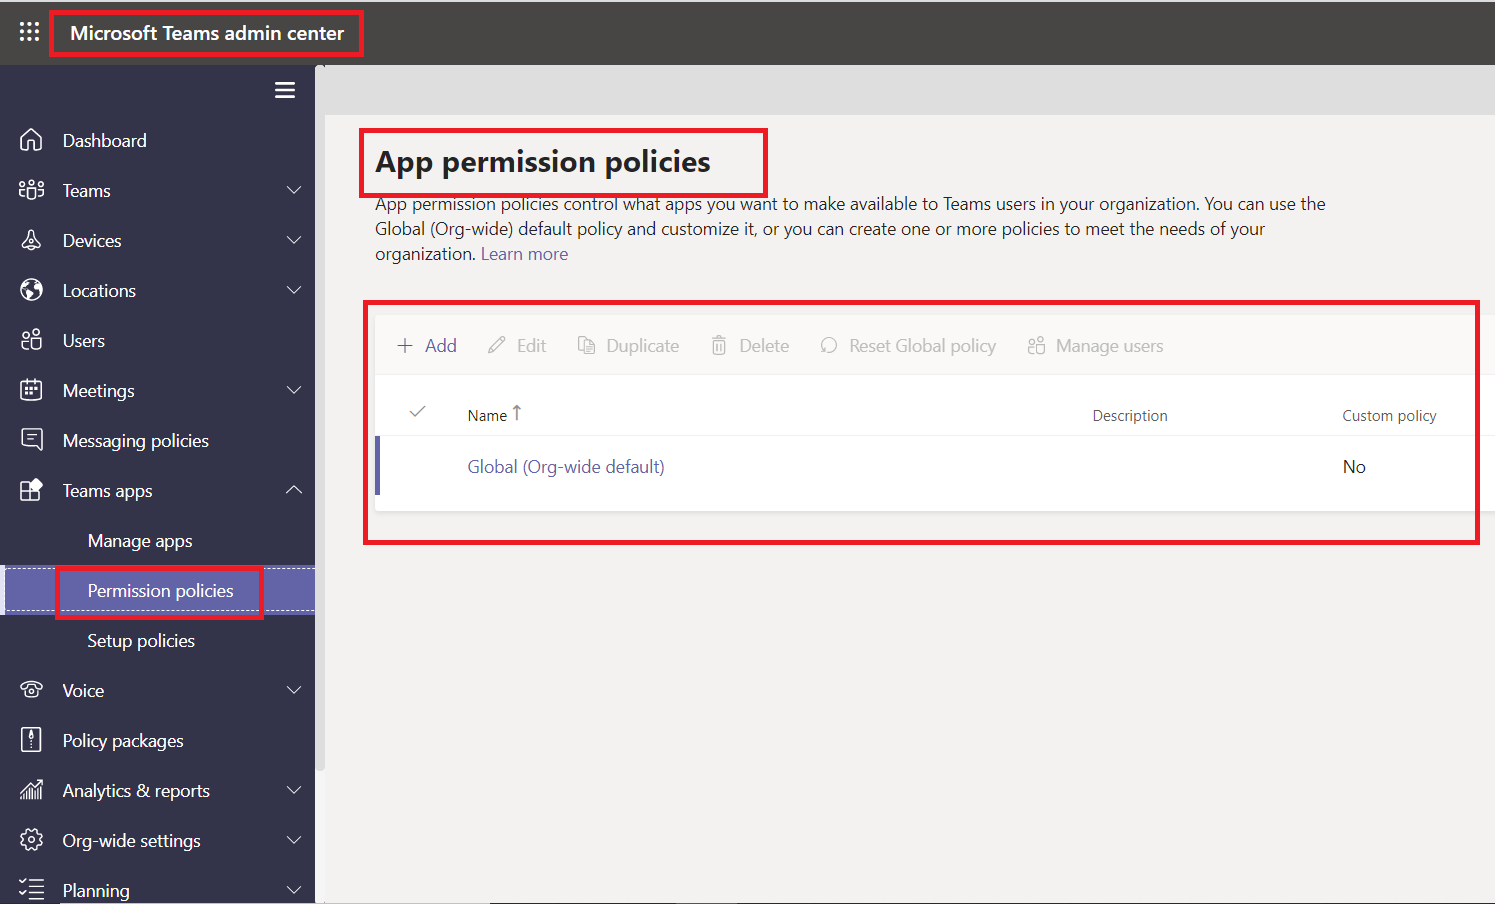
By default, we have the Global (Org-wide default) App Permission policy available. You can update organization-wide settings in the Global (Org-wide default) App Permission policy.
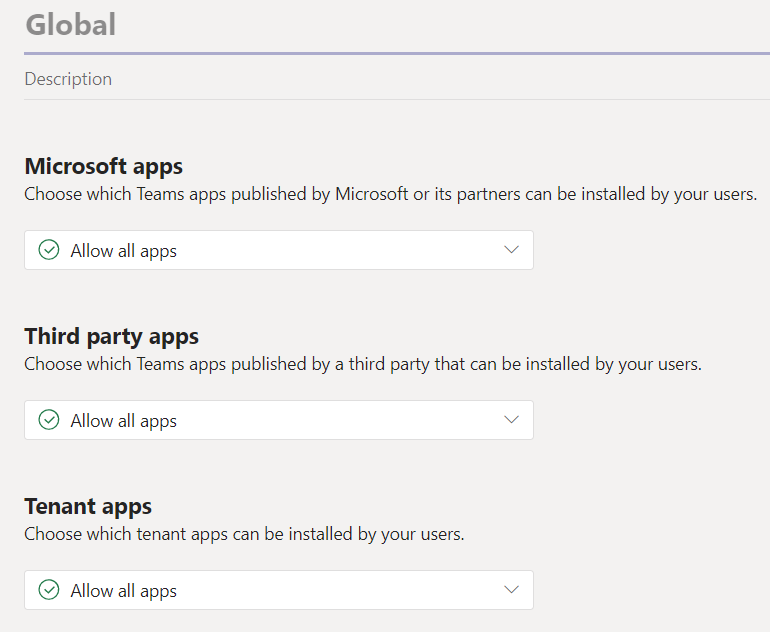
There are three types of features available in the App Permission policy:
- Microsoft apps
- Third-party apps
- Tenant apps
You manage app permission policies in the Microsoft Teams center. You can use the global (org-wide default) policy or create and assign custom policies to individual users or users in a group.
Users in your organization automatically get the global policy unless you create and assign a custom policy. Org-wide app settings override the global policy and any custom policies that you create and assign to users.
You can enable or block all apps or specific ones.
How to Add Custom App Permission Policy
To create and manage custom app permission policy, you required Team Service Administrator permission.
- Go to Microsoft Teams admin center à Select Teams apps menu in the left-hand navigation.
- Select Permission policies menu
- Click Add link in the right-hand section to add new custom policy.
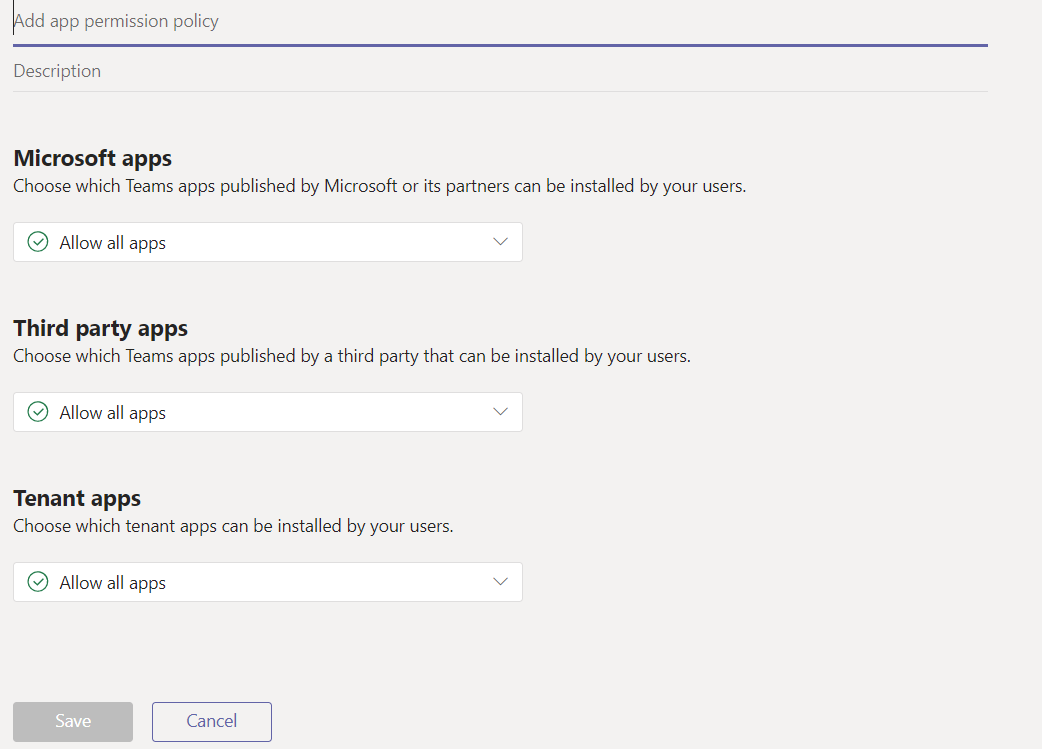
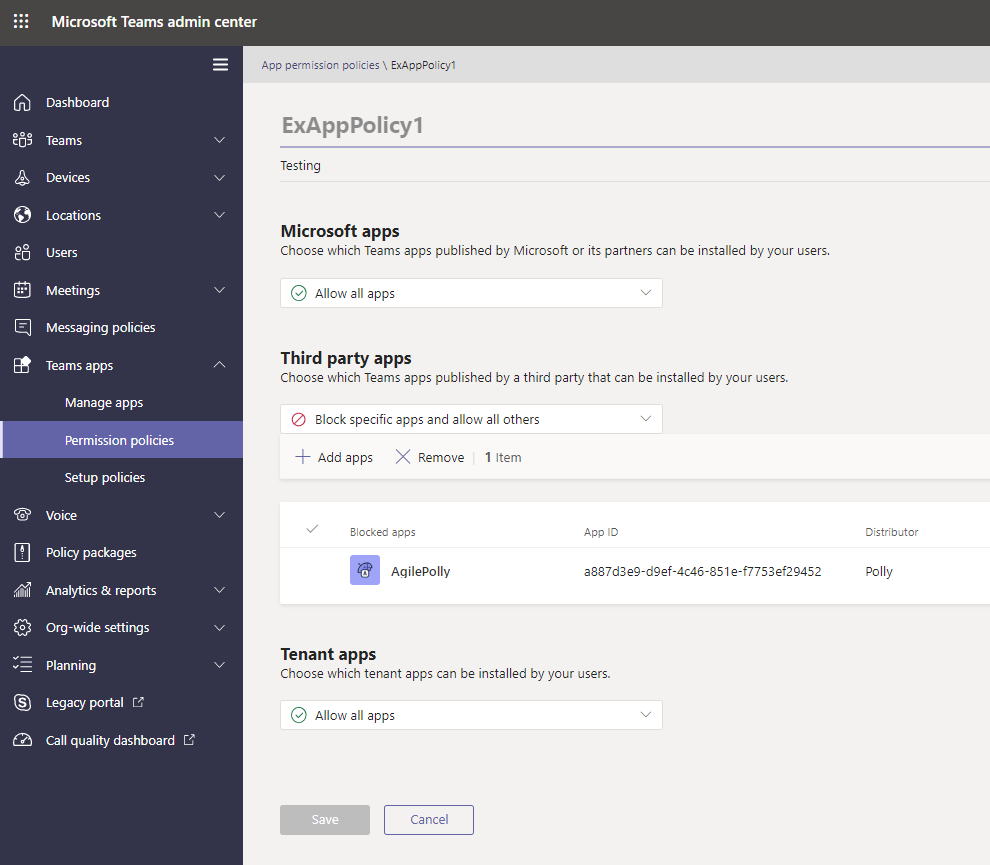
- Enter a name and description for the policy
- Under Microsoft Apps section, Third-party app, and Tenant apps
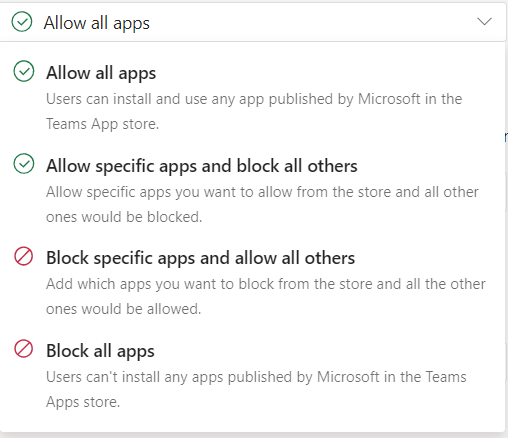
- Select one of the following
- Allow all apps
- Allow specific apps and block all others
- Block specific apps and allow all others
- Block app apps
- Select one of the following
- If you selected ‘Block specific apps and allow all others’, block the apps that you don’t want to allow:

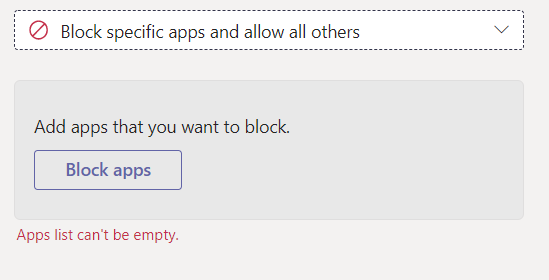
- Click the ‘Block apps’ button
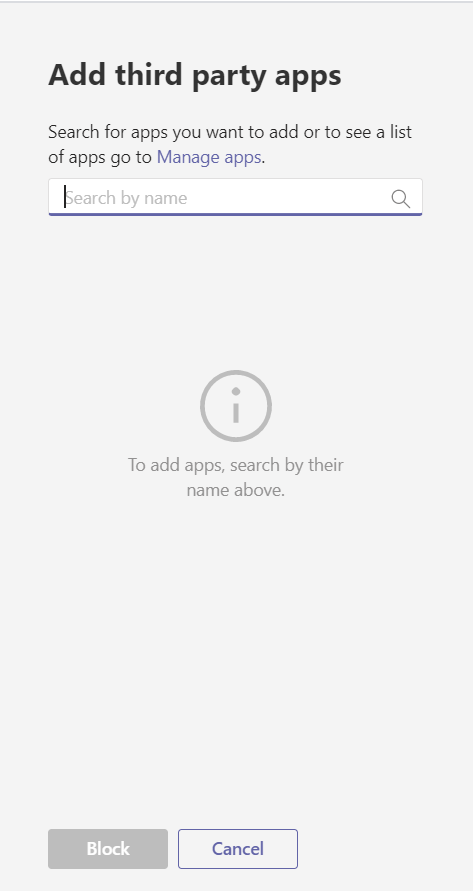
- Search the apps that you don’t want to allow, and then click Add. Continue the same steps for all apps you need to block.
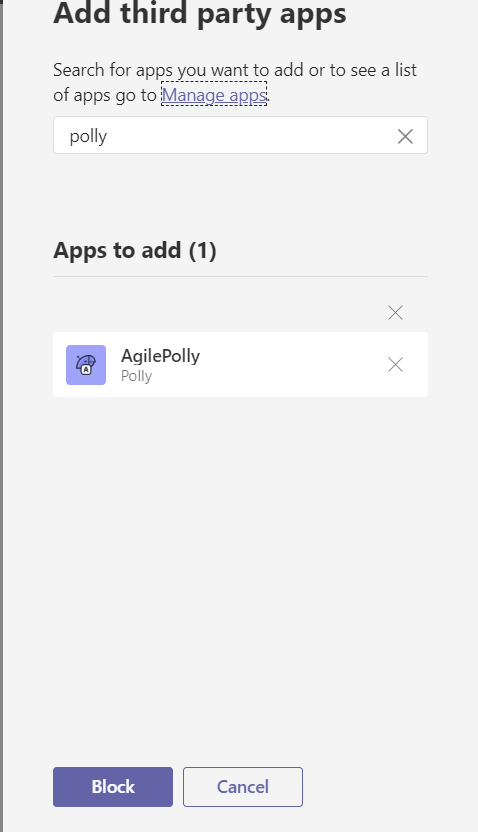
- Click the ‘Block’ button to apply the same to your permission policy.
- Click Save to save the custom permission policy. Refer below screenshot
- Similarly, you do for both Microsoft apps and Tenant apps permission policy.

Edit an App Permission Policy
We can use the Microsoft Teams admin center to edit the policy, including Global (Org-wide default) policy.
- Go to Microsoft Teams admin center a Select Teams apps menu in the left-hand navigation.
- Select Permission policies menu
- Select the policy by clicking to the left of the policy name and click Edit
- From here add or remove apps or block or allow all apps
- You can manage settings based on the app publisher and add and remove apps based on the allow/block setting.
- Click Save to update the app policy, and it will reflect all assigned users.
How to add users to the created custom policy
We can apply this custom policy to users in two ways:
- Apply app permission policy using Teams admin center
- App permission policy section
- User Section
- Apply app permission policy using PowerShell
Apply app permission Policy using Teams admin center
We have two ways to apply the app permission policy using Microsoft Teams admin center.
- App permission policy section
- User Section
Apply App permission policy to users via app permission policy section
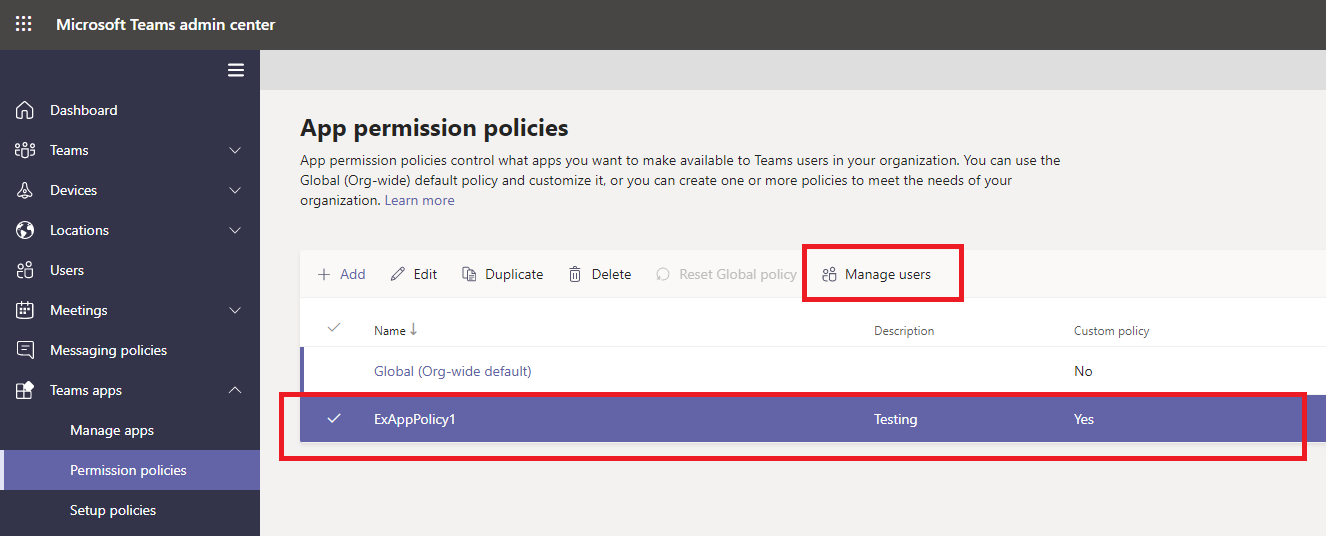
- In the left navigation of the Microsoft Team Admin Center, go to Teams apps -> Permission policies
- Select the policy by clicking to the left of the policy name
- Select Manage users
- In the Manage user pane on the right-hand side, search for the user by display name or by username, select the name and then click Add. Repeat the same for all required users.
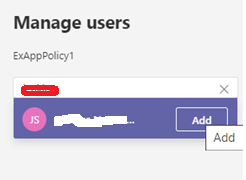
- When you are finished adding users, click Save to apply the policy to the users.
Note: All admin activities do not reflect immediately. It will take 20 mins to 24 hrs maximum.
Apply App permission policy to users via Microsoft Teams admin center users’ section
- In the left navigation of the Microsoft Team admin center, go to Users

- Select required user
- Click Policies tab, refer screenshot
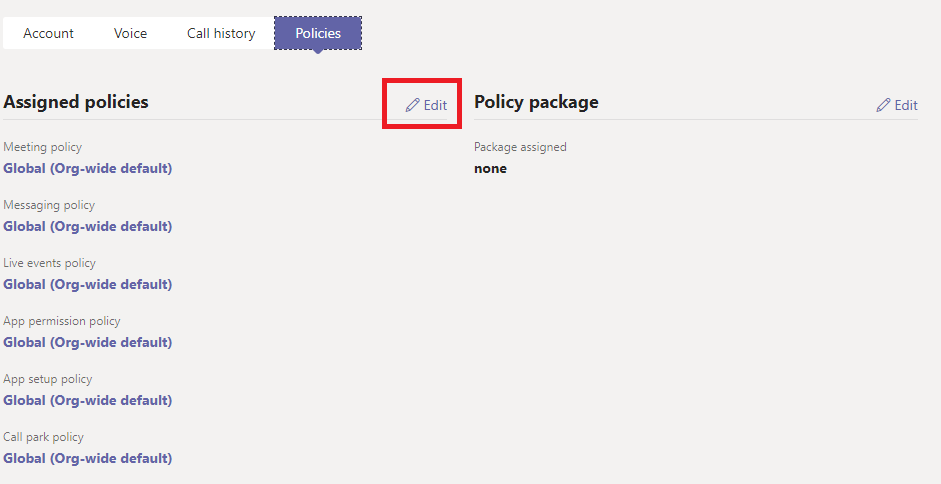
- Click Edit next to Assigned policies
- It will open Edit user policies pane in the right-hand side
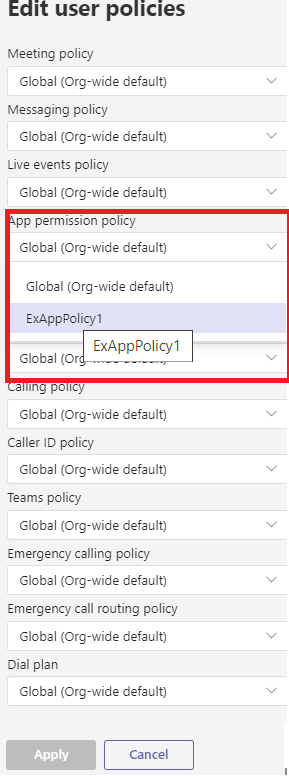
- Select required a policy in the App permission policy
- Click Apply to apply the policy to the user
Apply Microsoft Teams app permission policy using PowerShell
We can apply the Teams app permission policy using ‘Grant-CsTeamsAppPermissionPolicy’ cmdlet, you can use app permission policies to enable or block specific apps for your users.
Follow the below steps to grant Teams App Permission policy to users:-
Step 1: Download and install the Skype for Business Online Connector module (one-time activity)
- https://www.microsoft.com/download/details.aspx?id=39366 – Download the SkypeOnlinePowershell.exe file
- Double-click the SkypeOnlinePowershell.exe file and install in your machine
- In the Skype for Business Online, Windows PowerShell setup wizard, on the Microsoft Software License Terms page, select I accept the terms in the License Agreement and then click Install. If the User Account Control dialog box appears, click Yes to continue the installation.
- On the Completed the Skype for Business Online, Windows PowerShell Module page, click Finish.
Step2: Connect Office 365 from a single instance of Windows PowerShell
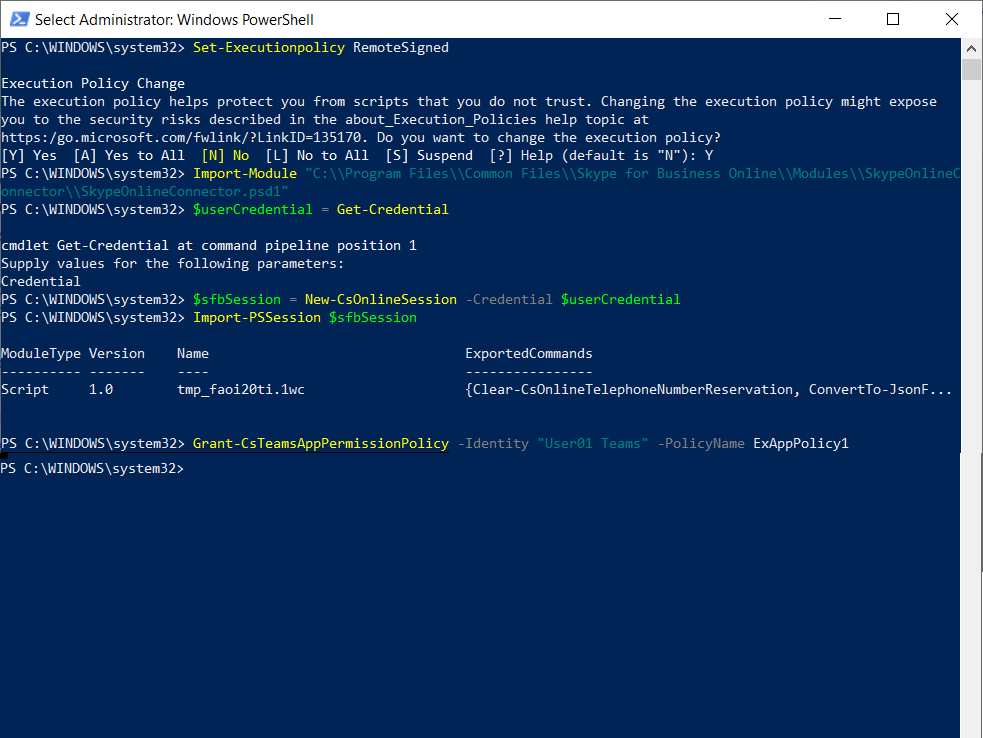
- Open Power Shell as an administrator
- Run as administrator
- Set-Executionpolicy RemoteSigned
- Enter Y
- Import SkypeOnlineConnector to this instance
- Import-Module “C:\\Program Files\\Common Files\\Skype for Business Online\\Modules\\SkypeOnlineConnector\\SkypeOnlineConnector.psd1”
- Run below command to validate or get credentials
- $userCredential = Get-Credential
- Get Skype for Business session
- $sfbSession = New-CsOnlineSession -Credential $userCredential
- Import the sfb session
- Import-PSSession $sfbSession
- Apply the policy to the user using below command
- Grant-CsTeamsAppPermissionPolicy -Identity “User01 Teams” -PolicyName ExAppPolicy1
In this above example, a user with identity “User01 Teams” is being assigned the ExAppPolicy1
Apply app Permission policy for multiple users using CSV file
If you want to apply multiple users, then apply the policy to all users in the CSV file. This script also required Skype for Business online PowerShell module.
function Apply-TeamsAppPolicyUsingCSV
{
param (
$ImportPath
)
process{
$userCredential = Get-Credential
$sfbSession = New-CsOnlineSession -Credential $userCredential
Import-PSSession $sfbSession
$users = Import-Csv -Path $ImportPath
foreach($user in $users)
{
Grant- CsTeamsAppPermissionPolicy -PolicyName $user.PolicyName -Identity $user.EmailAddress
}
}
Apply-TeamsAppPolicyUsingCSV -ImportPath c:\AppPermissionUsersansPolicyname.csv
In this above example, we have list of users and policy name for that user, this script will assign the policy to the user.